Night Vision Webcam

Every year I setup a mab scientist lab for my Halloween Haunted Garage. I wanted to find a way to record better video because in years past, my cell phone and Flip camera didn’t record well because of the dim lighting. So this year I wanted to do something with night vision and on the cheap.
The scope of this tutorial is how to modify a simple inexpensive webcam and convert it to use infrared lighting so you can have night vision video. This tutorial applies to almost every webcam except those that are already night vision capable (which I understand have very bad image quality anyways). Why a webcam? Because HD webcams are fairly inexpensive and I want to be able to stream my haunt online for others to watch.
I chose a manual focus camera because it’s an easy modification. Cameras that have auto focus require de-soldering, and re-soldering the auto focus electronics. It’s not impossible, but it was more work effort than I wanted to do. Plus certain auto focus webcams won’t focus correctly once the IR filter is gone because the distance from the lens to the sensor has changed. With manual focus, you can still control the lens’ focusing ability.
Quick background: Every digital photo capturing device (from a webcam to an expensive DSLR) comes with an IR filter in front of the sensor. Some have the IR filters on the back of the lens, others have it attached right above the sensor. This is to block out unnecessary IR light, resulting in images that are “true to life” in terms of colors. Without the IR filter, everything would be kind of redish/yellowish and just weird. Removing the IR filter allows you to use IR lighting as your “flashlight” at night. Which results in a webcam that has weird real-life colors, but with night vision. With this in mind, I don’t recommend modifying your “daily” webcam! Perform this modification on a separate webcam!
- Warning! Doing this modification will more than likely void your warranty. By reading my instructions to perform this modification you accept the fact that you could break your webcam. I cannot offer you support should you break your webcam. I am not responsible for your actions.
- PERFORM AT YOUR OWN RISK!
So with that out of the way, let’s get started! I modified a Logitech Quickcam c510. I found it locally at Walmart and it was about $40 at time of writing. If you can’t find this particular camera, don’t worry, almost any webcam will work. You need to make sure you get one with fixed focus. This modification is much harder to perform on auto focus cameras and is somewhat out of scope for this tutorial!
Tools required:
- Webcam with manual focus (if it says “Always Focused” or “Fixed Focus”, that’s what you want)
- Eyeglass screwdriver set
- Razor blade
- Hot glue
- Safety glasses (since we’re breaking glass)
- Patience! Do not rush, or you’ll risk damaging the camera.
Step 1:
Remove the cover off the webcam. This is a little tricky and requires a razor blade for cleanest removal. I slid the razor blade under the left corner coming up from the bottom and started wiggling it around until it slid under even further. From there I carefully peeled upwards.
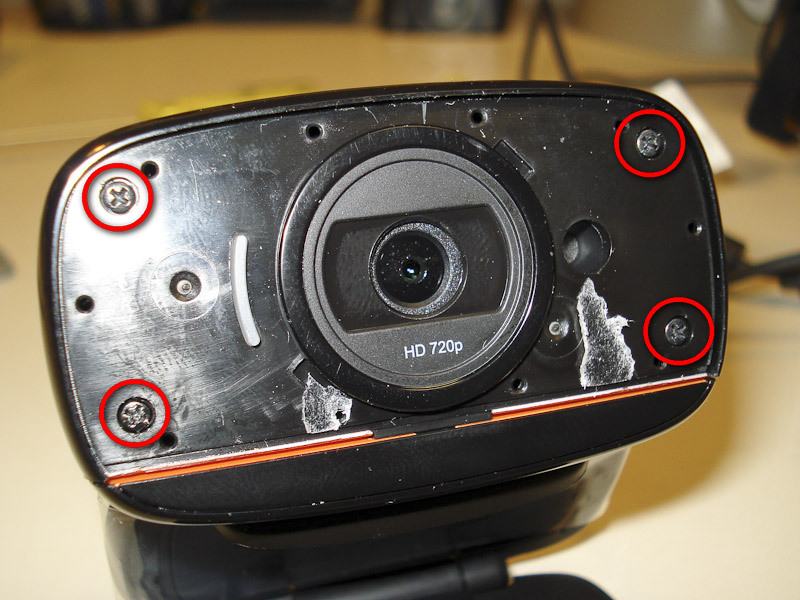
Once the cover is off it’ll reveal 4 screws holding the camera together. Unscrew the 4 screws and pull on the back of the camera to open the case to get to the circuit board.
Step 2:
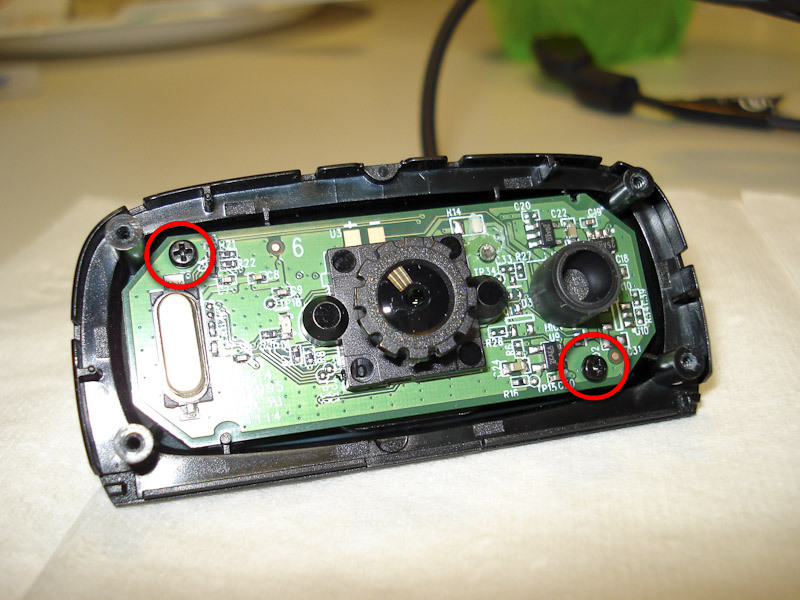
Unscrew these 2 screws to remove the circuit board from the case.
Step 3:
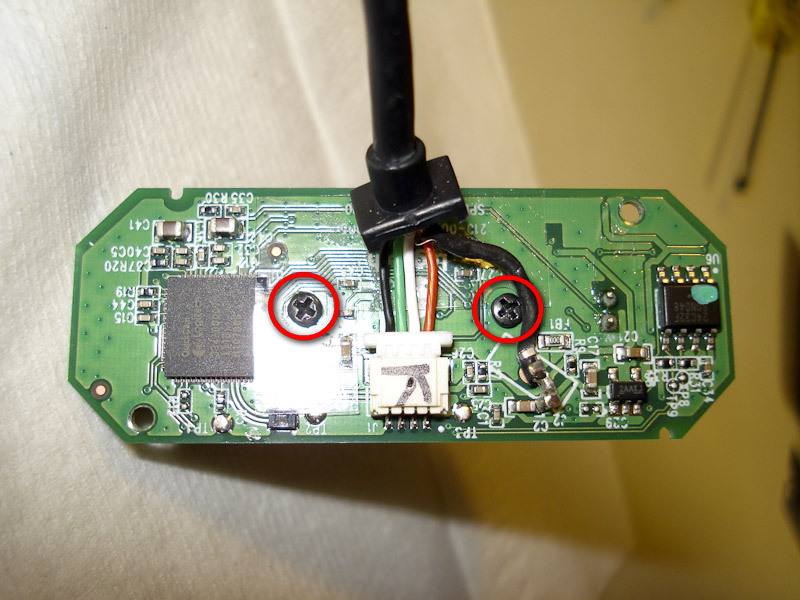
Remove these 2 inner screws which will remove the lens assembly.
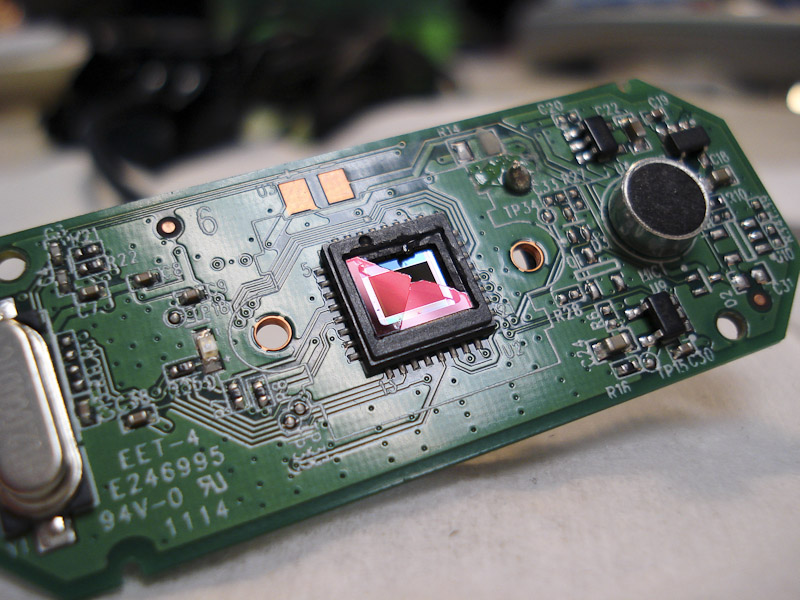
Step 4:
Once the lens assembly is off, you’ll clearly see the image sensor and the IR filter laying above it. The IR filter has the magenta hue to it.
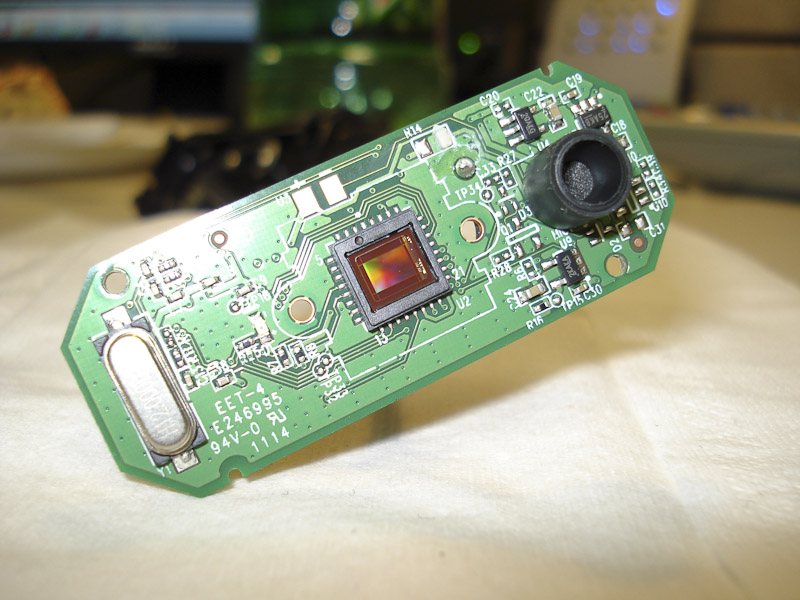
This is where the fun and nerves begin! I inspected the filter and found that it was separate from the imaging sensor and glued on, so I knew I could break it off. I also saw that it wasn’t 100% flush against its housing, so using the razor blade I snuck it into the top part of the housing and tried to get under the filter very carefully. Once I saw that I had broken some glue, I then use an outward force, to break the glass (and move my blade) AWAY from the sensor. You don’t want to touch the imaging sensor! Doing so will pretty much break your camera!
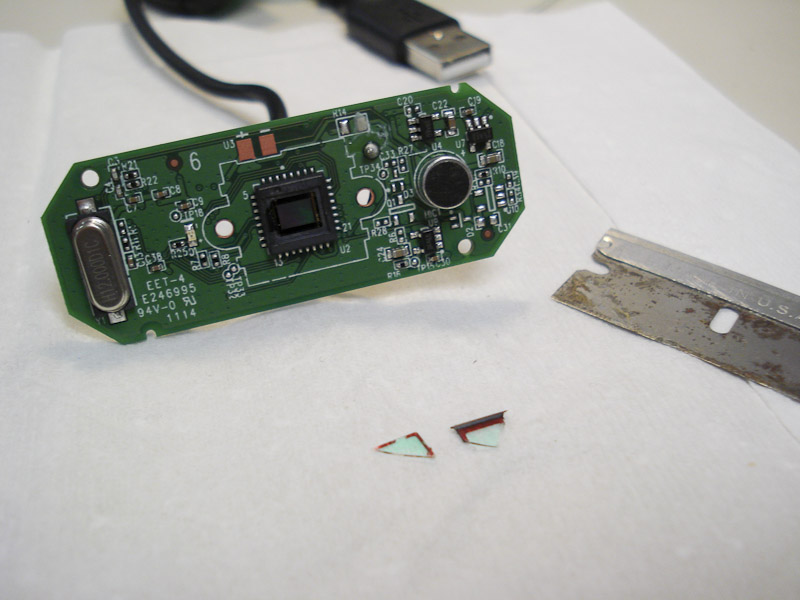
My filter broke into 3 pieces – yours may break differently. From here, do whatever you can to get the rest of it off without touching the sensor.
Step 5:
Once you have the IR filter off and you know you didn’t touch the sensor, you’re almost in the clear. We now need to focus the camera. Put the lens assembly back on and plug the webcam into your computer and open the software so you can see your camera.
Chances are your image is out of focus. The “Always Focused” cameras have glue holding the lens focus ring in place. Simply twist the lens to break the glue, and use the image on your screen to adjust focus. Once it’s focused use a small dab of hot glue to hold it in place. Essentially mocking what the manufacturer did.
Once you’ve done that, follow the directions backwards to reassemble the camera.
To do a quick test, plug in your webcam, turn off all the lights and grab your TV remote control. Press and hold a button on the remote (I prefer the volume up (with the TV off)). This will emit the remote control’s IR light. You should be able to see it on your screen and use it as a flash light, lighting up all kinds of objects in the room that you can’t see with your eye since the lights are off.
Objects are lit with a TV remote control. Guess my camera is slightly out of focus. Gotta fix that!
If you don’t have an IR light, I suggest you grab yourself this one from Amazon. It has 36 IR leds and can light objects up to 50′ away!
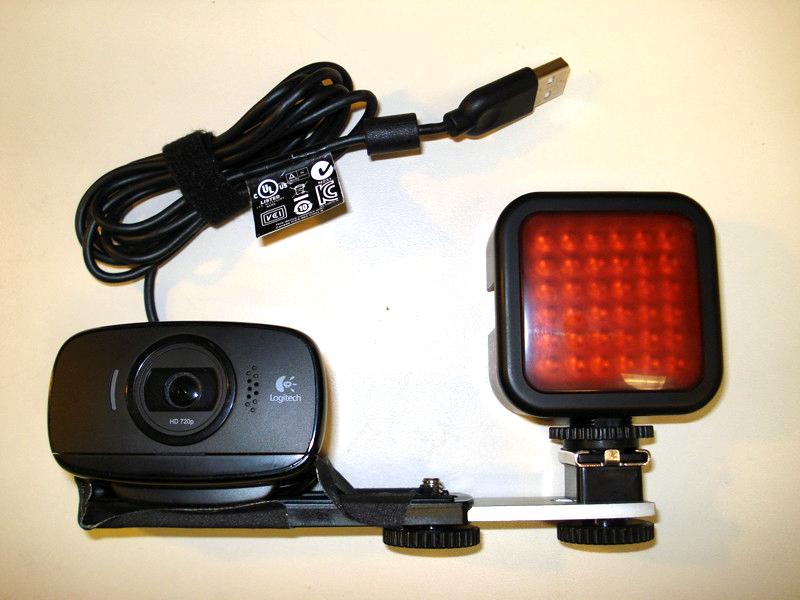
A little gaffers tape and you're good to go. If you're feeling really ambitious, you could screw it onto the bracket
That’s it, you’re done! Now it’s time to start recording some night vision video! 🙂