High Voltage Climbing Arc Prop (Jacobs Ladder)

Just for good measure, let’s get this out of the way up front:
- The information within this article is to be considered educational only. Do not try this at home. Do not attempt anything you read in this post. Consult with professionals. Be smart and be safe. I’m not responsible for any damage to person or property for the information contained in this article.
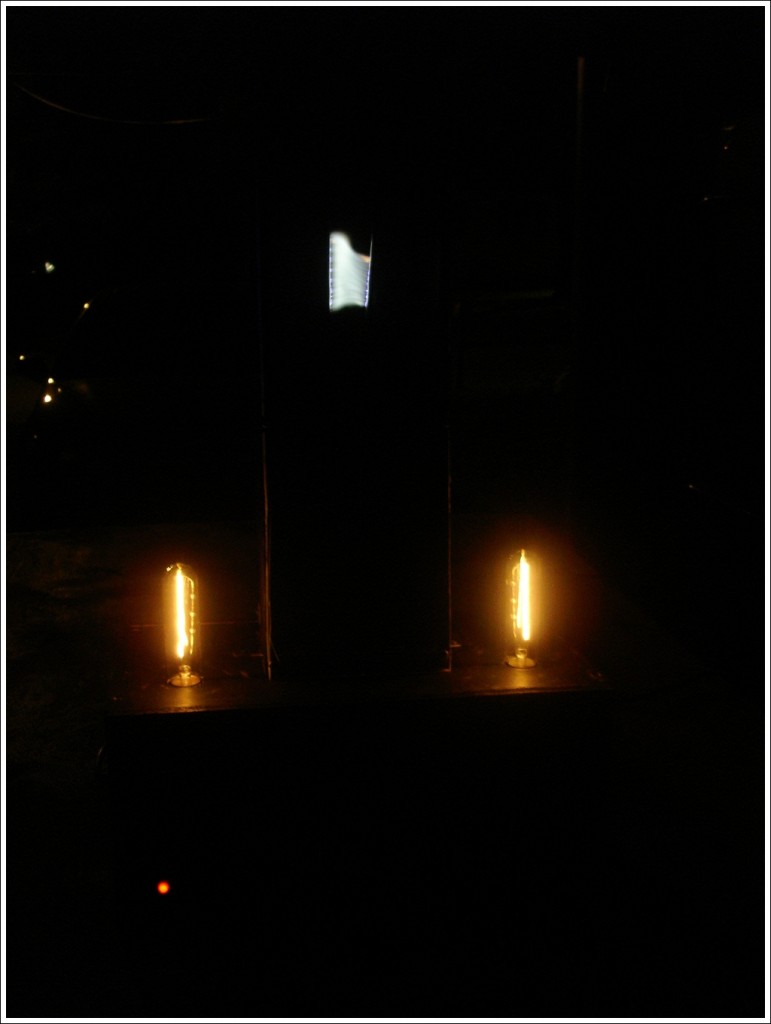
One of my first Halloween props I made myself was my high voltage climbing arc prop, which is also known as a Jacob’s Ladder. I love the sound the high voltage arc makes as it climbs its way to the top.
Here’s a quick write up on how I built mine!
Materials Needed:
- Neon sign transformer. Mine is similar to this one.
- High voltage wire. This link is for eBay, and may or may not work.
- Under cabinet stemware rack.
- Brass grounding clamps
- 2 lamp sockets
- 2 T9 Edison style Bulbs
- IEC C14 Male Plug Panel Power Inlet Socket Connector
- Even better, this IEC male power connector has a power switch on it, too
- PC power cord
- Toggle Switch
- Rotary dimmer
- 110 volt AC LED panel mount light
- Wire nuts, bolts, nuts, washers, screws, plywood and 1×6 pine board
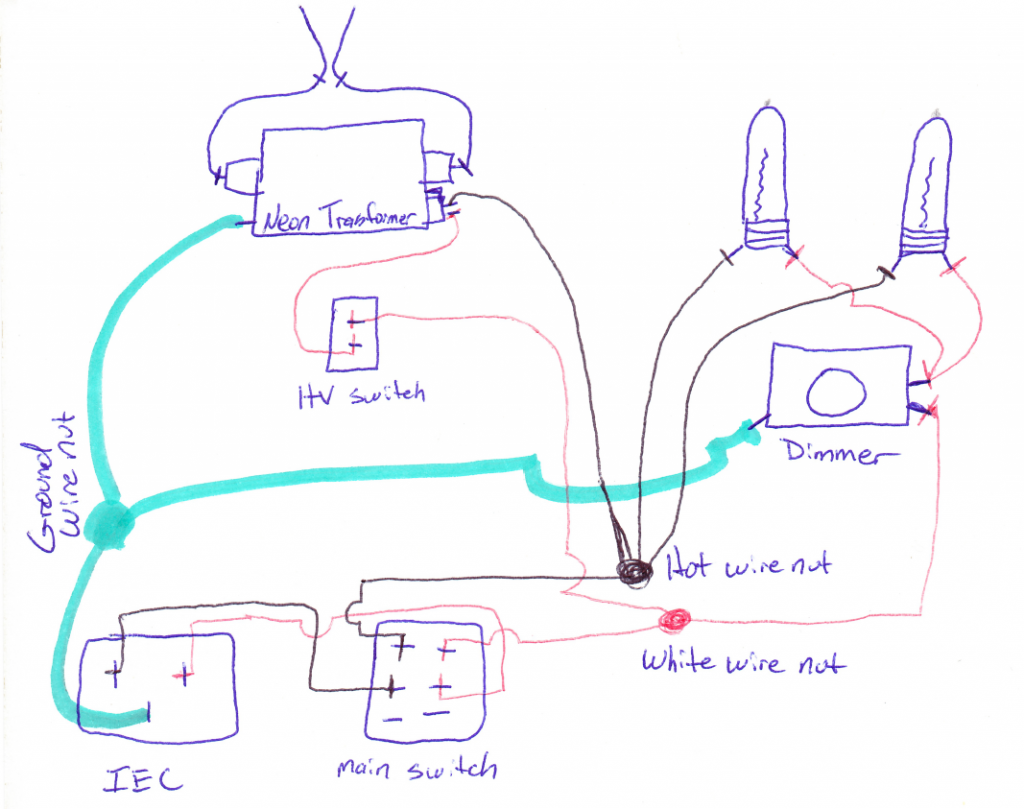
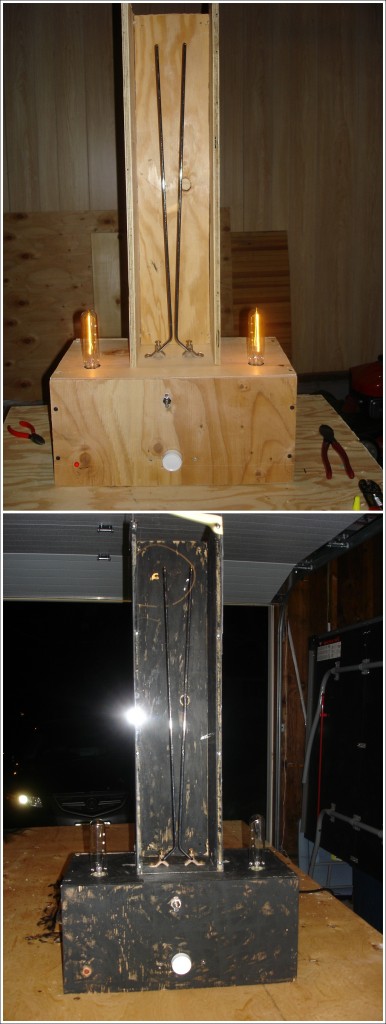
Since this was one of my first props, I have an official hand drawn wiring diagram! I wanted to add on to the look of the prop by adding some T9 Edison style bulbs to the effect. That way if the high voltage is off, the prop still has a nostalgic glow to it. Knowing I was working with high voltages, I wanted to have 2 power switches. A main switch on the back of the unit which would power on the light bulbs, then a second on/off toggle switch which would turn on the transformer. The bulbs are pretty bright, so I added a dimmer switch to get the desired dim lit effect.
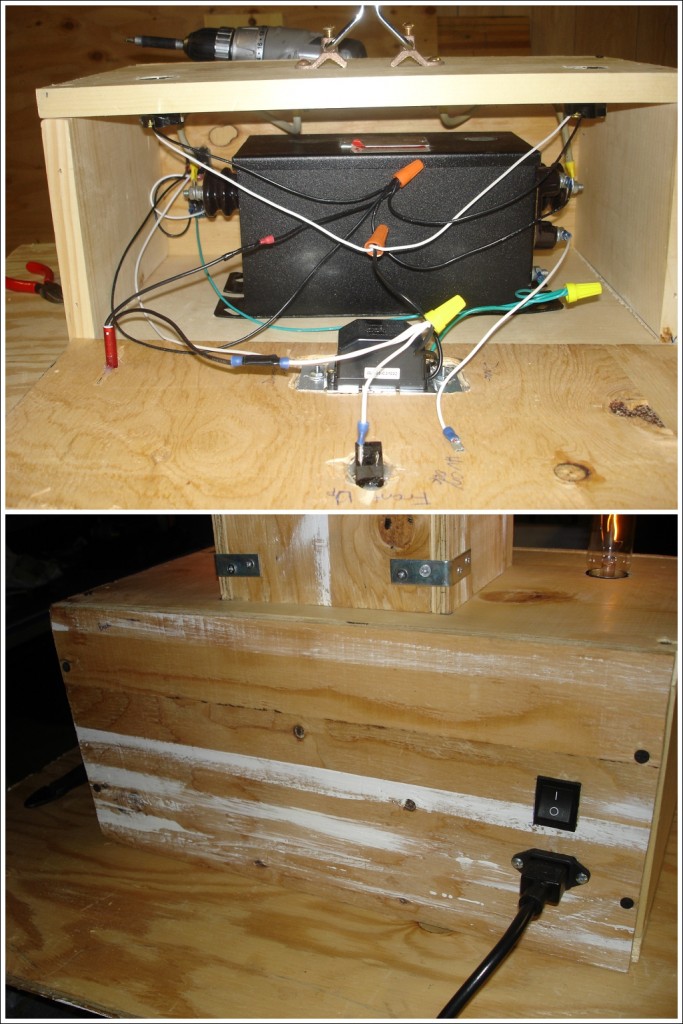
My first step was to take the neon transformer and measure it. I then built a basic box that was about inches bigger and wider than the transformer itself. This allowed for room for wires and the light bulbs.
I then cut the under cabinet stemware rack into 2 long metal poles. At the same time I hacksawed the metal ground clamps to get one of the sides off. This way the voltage doesn’t jump from ground clamp to ground clamp. The idea is to get the voltage arc to climb up the metal stemware poles.
When mounting the grounding clamps to the wood, the goal is to get the “bent” part of the separated stemware holders, about a half inch away from each other. Once you’ve measured that, then you can mount the grounding clamps to the board. Pass a long screw through to the bottom, and wire up the high voltage wire to the screw, and into the transformer.

Once I had the ground clamps in place, and the transformer wired up, then I knew where to cut in the holes for the light sockets. I decided to go with two of them for the uniformed look.
I simply hot glued the light sockets in place. Next up was to cut in the IEC power socket in the back of the box, with the main power switch. Then the front plywood, I cut in the dimmer spot, as well as the LED panel light and the High Voltage on/off toggle switch.
When everything is wired up and working, I realized that the high voltage is pretty… scary, literally! So I ended up making an enclosure for the stemware poles. This way no wandering hands could interfere with the climbing arc.
I made the enclosure out of scrap plywood, and a Plexiglas front (the Plexiglas is a little visible in the black painted photo).
A sloppy coat of black paint and it’s good to go! The main switch on the back turns on the lights, and the front switch turns on the high voltage arc!